Thunder Pools, Premier Pool Builder Oklahoma City - Pool Construction Process
At Thunder Pools, we believe in setting clear expectations right from the start of your project. We understand the importance of keeping our clients informed throughout the new pool construction process. That’s why we have developed a comprehensive and transparent approach that ensures you have all the necessary information at your fingertips.
From the initial consultation, helping with spa pool finance options, to the final touches, we guide you through each phase of your pool construction project with expert precision. Our experienced team will provide you with specific details and updates tailored to your unique project, ensuring you stay informed every step of the way.
We take pride in our informative approach, which has earned us the trust and satisfaction of our valued clients. By keeping you in the loop, we empower you to make informed decisions and address any concerns or questions that may arise during the construction process.
Understanding each phase of the pool construction process is crucial to fully grasp the intricacies of your new pool and landscape. With Thunder Pools, you can expect a seamless experience and ongoing communication that keeps you engaged and confident in the progress of your project.
Experience the Thunder Pools difference and embark on a new pool construction journey with complete peace of mind. Contact us today to learn more about our transparent construction process and get started on creating the pool of your dreams.
STEP 1
CAD plan/Permitting
- DURATION: 2 days to 4 weeks
Prior to construction, your new pool is reviewed by our design and construction team, CAD Department, Engineers and the Thunder General Manager, Charles Daye. All the construction notes are carefully put on the plans for permitting and for use by our crews. Permits are then obtained. This process can take anywhere from 3 weeks to 4 weeks, depending on the municipality.
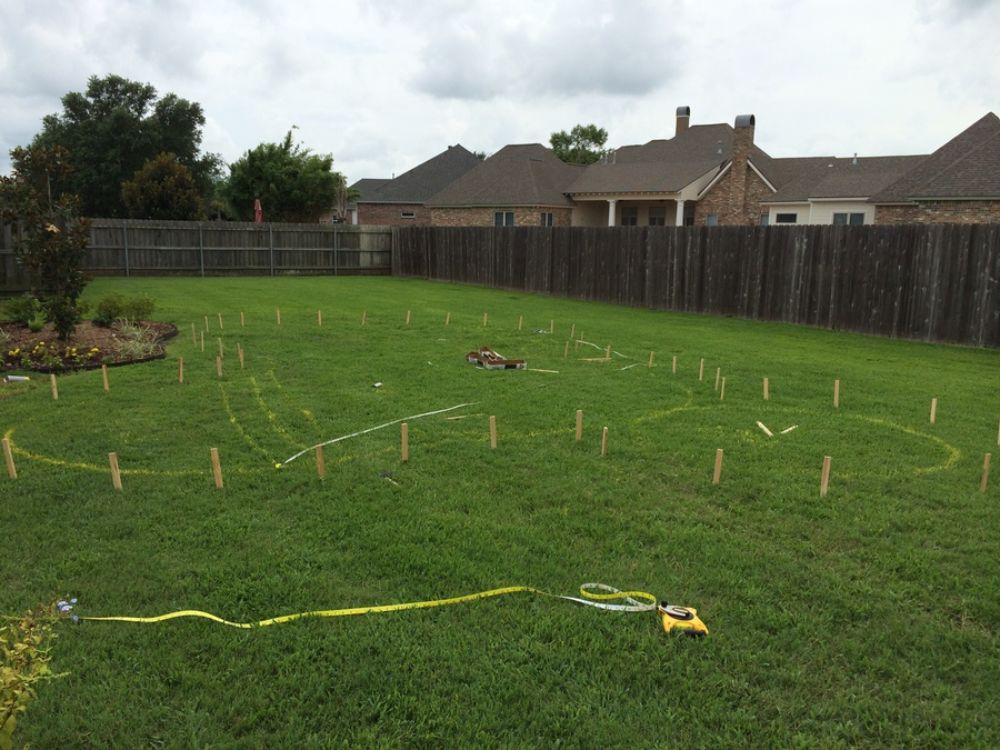
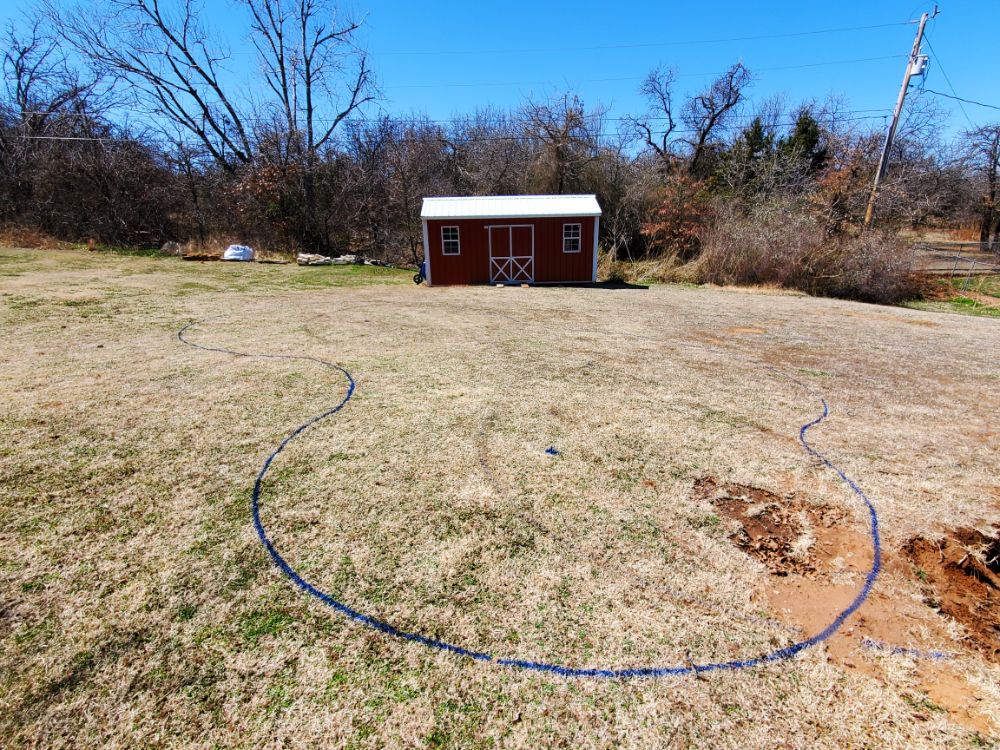
STEP 2
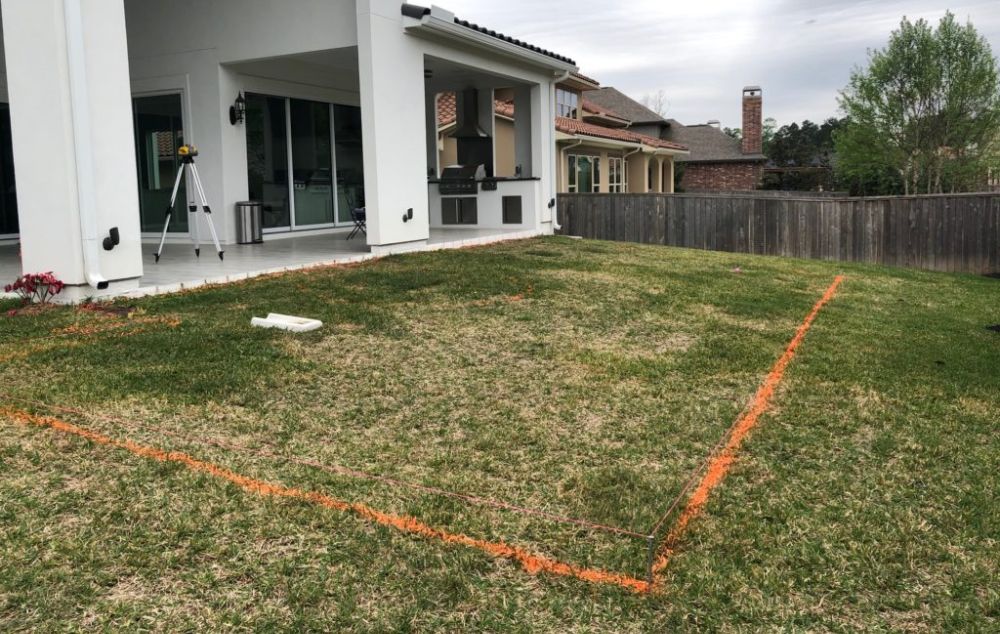
Pool Layout
- DURATION: 1 to 2 hours
Once the engineering and permitting is complete, the plans are carefully transposed to your yard. The layout person has a precise drawing which ensures that your new pool is built to within inches of measurements we have specified on the plan. Other important details are also marked out, and the homeowner has a chance to see the proposed new pool prior to excavation. Any final changes and alterations can then be made before the excavation begins. These detailed steps allow THUNDER to make sure that we are building YOUR perfect pool.
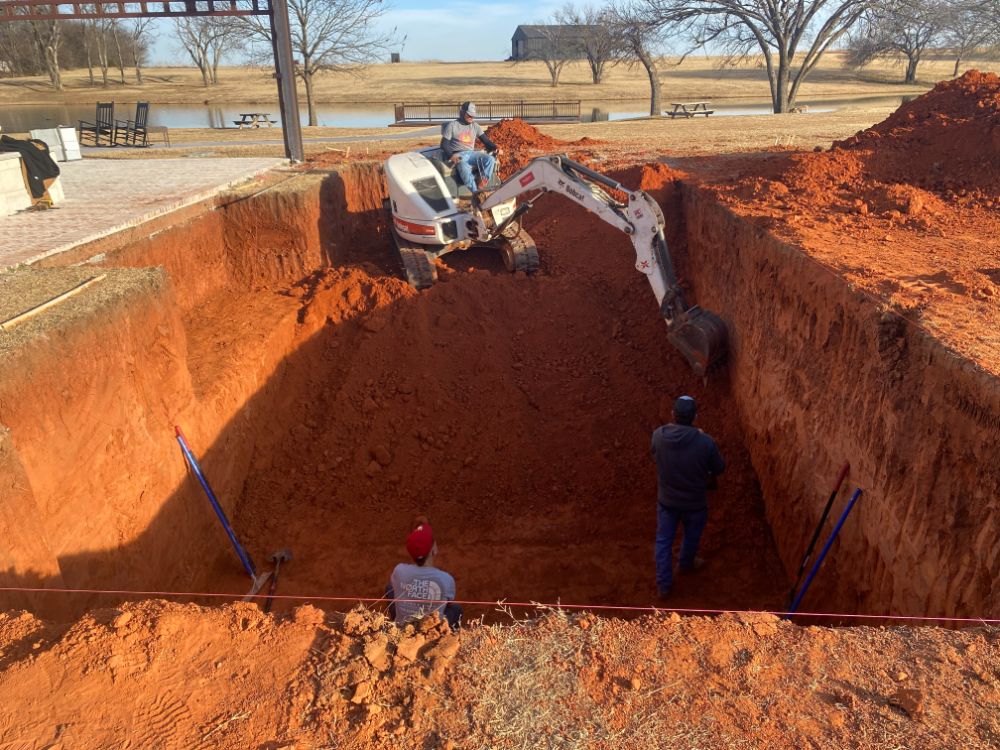
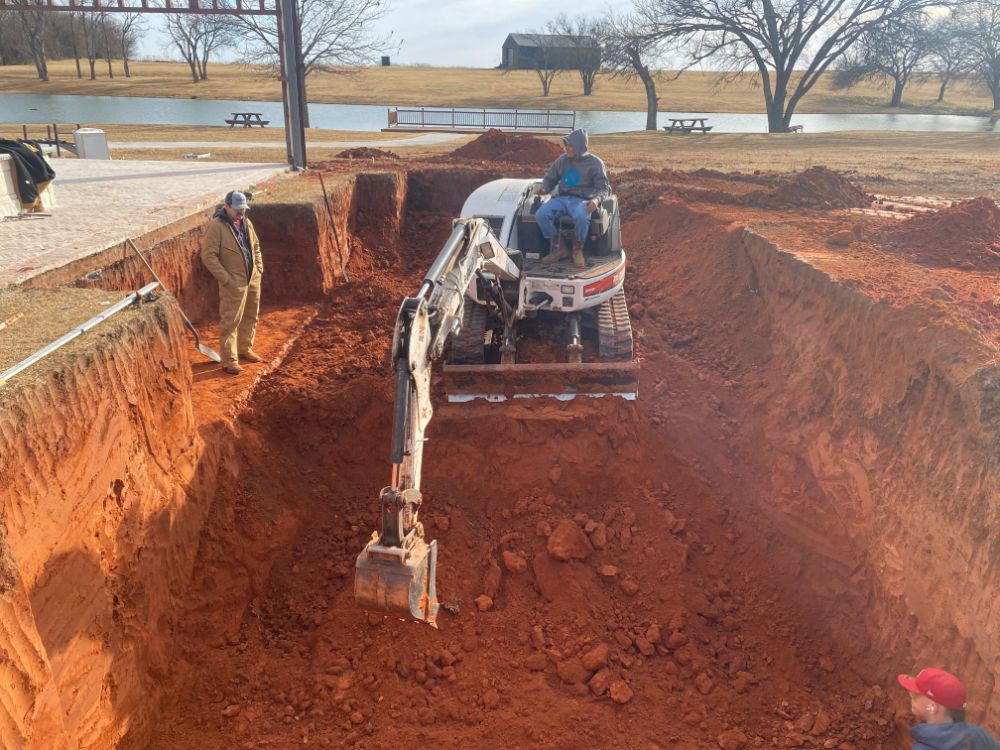
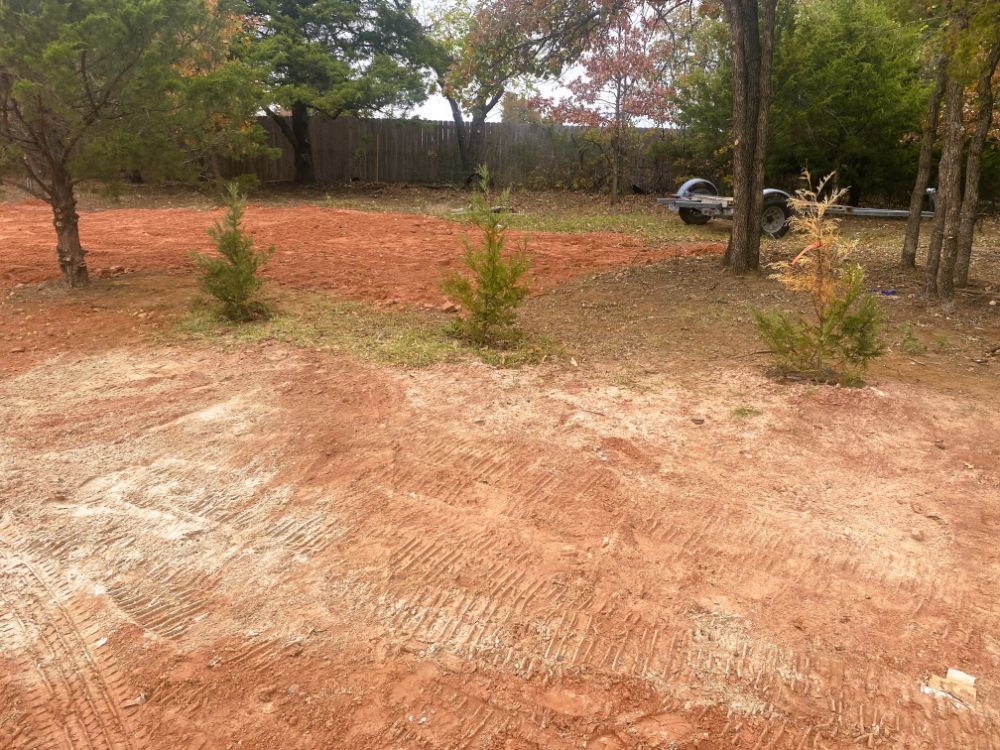
STEP 3
Excavation
- DURATION: 1 to 3 days
The next phase of your pool process is the excavation. This marks the start of the swimming pool construction process. This usually includes heavy equipment (bobcats, backhoes, and dump trucks) to dig your new pool and remove the excess soil from your property. Our excavators take many precautions when digging your pool and forms are set to show our crews the shape and size of your new swimming pool.
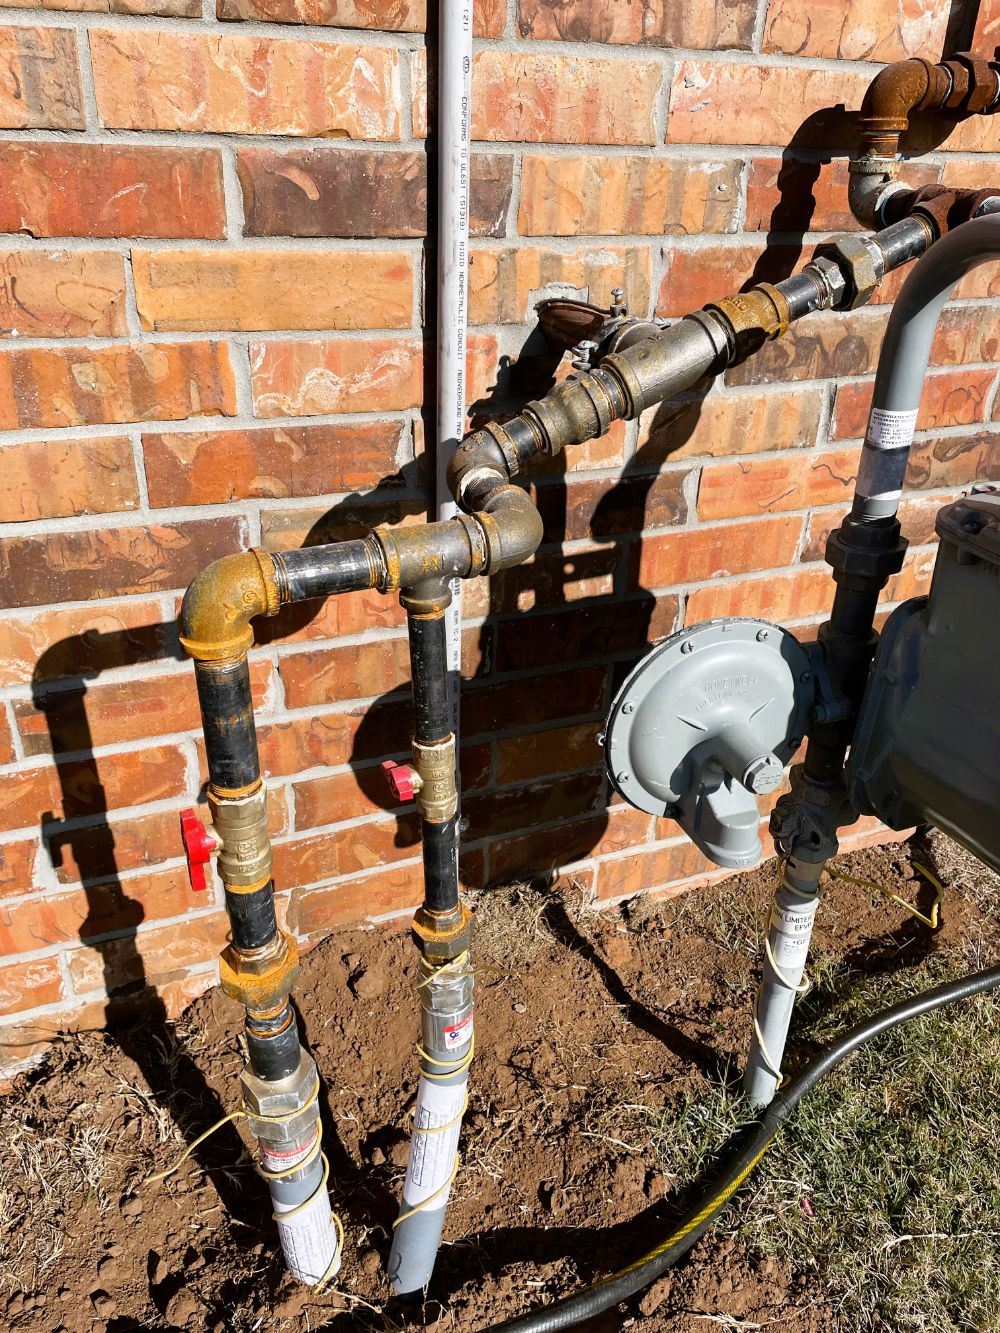
STEP 4
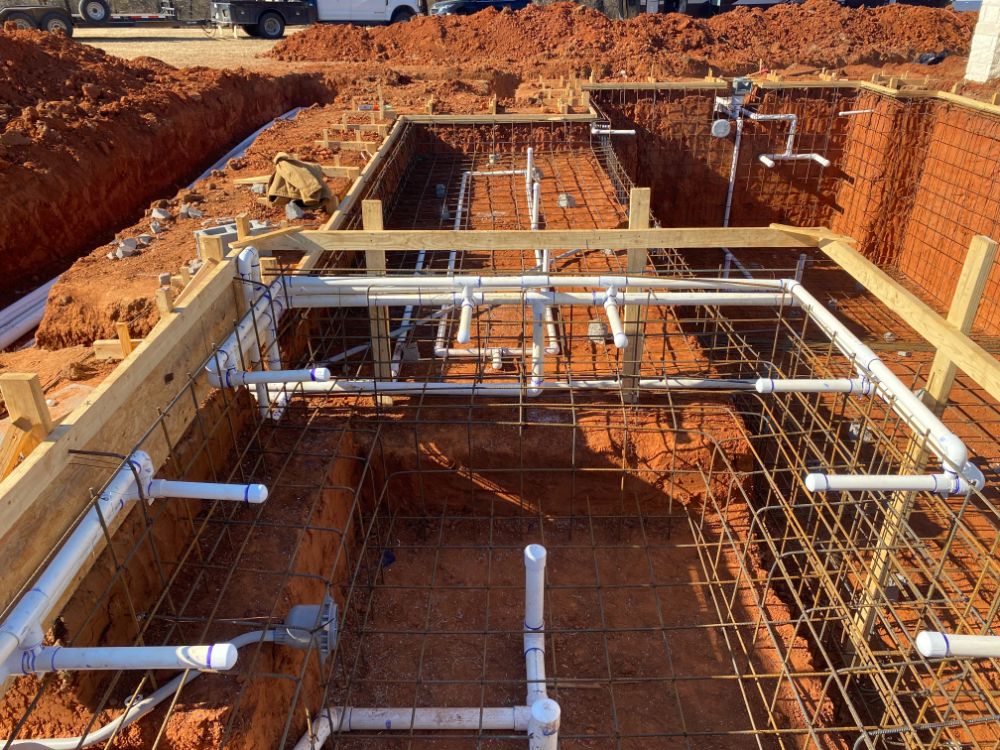
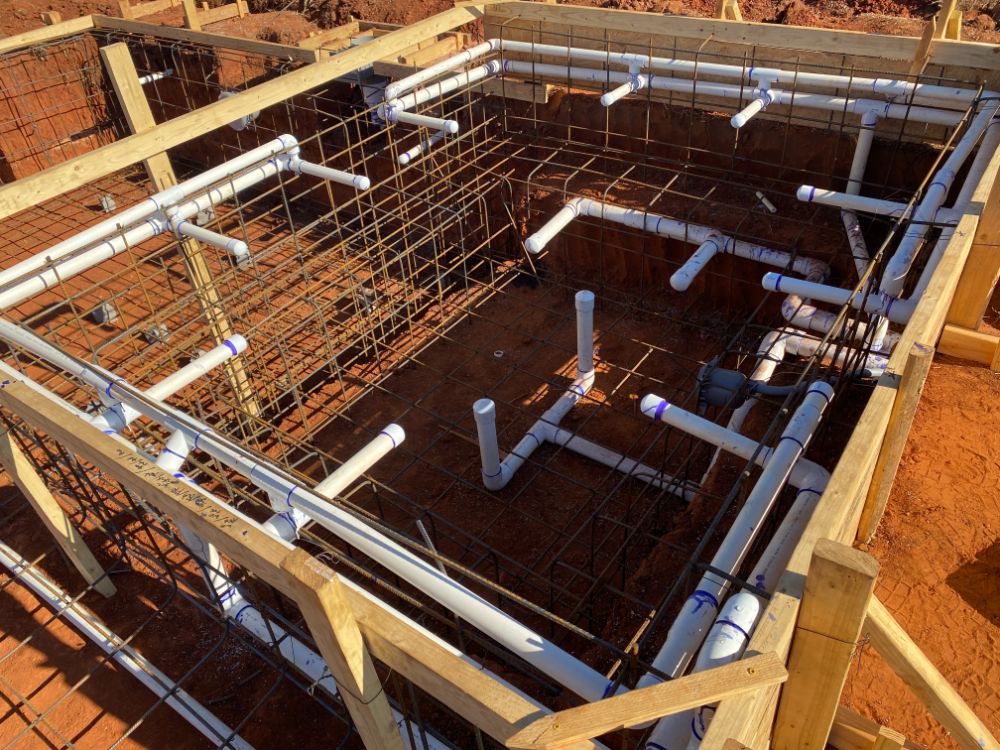
Plumbing
- DURATION: 1 to 2 days
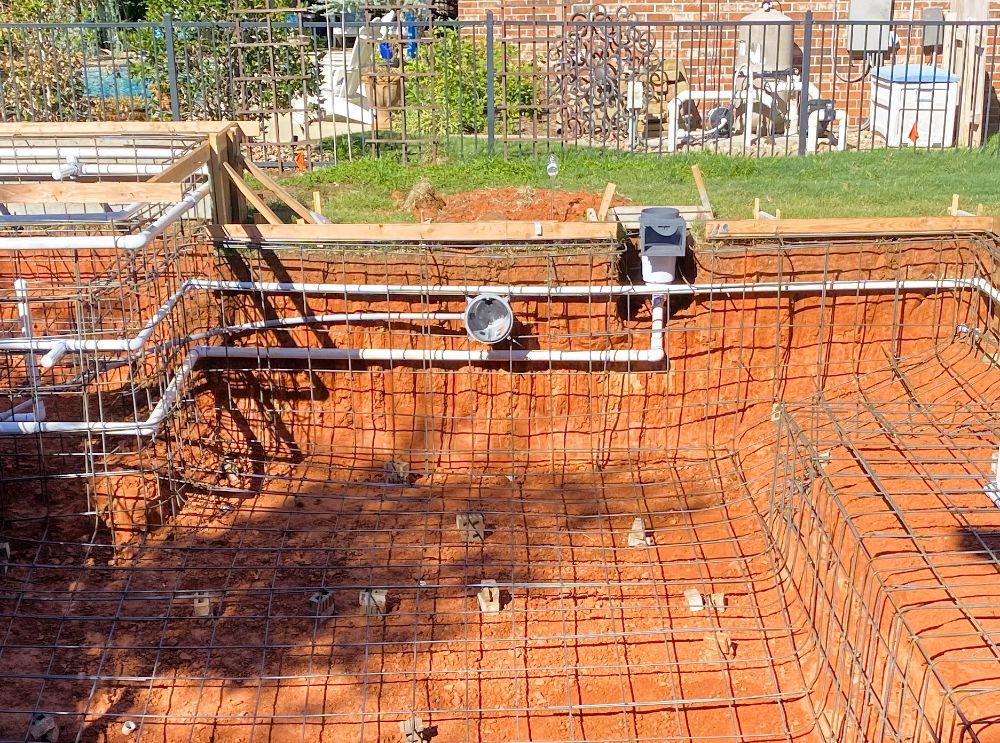
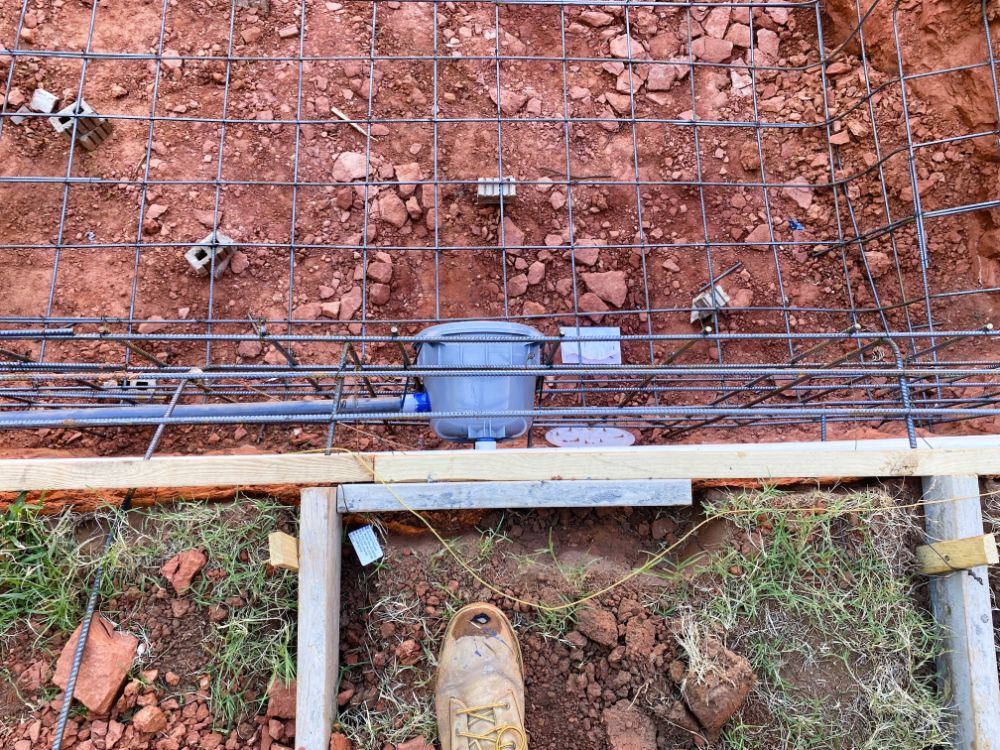
Building a new swimming pool requires careful attention to plumbing, which is a crucial aspect. Our emphasis is on large-scale plumbing, hydrology, and pump efficiency, so we exercise caution during this phase. Our General Manager, Charles Daye, reviews and approves all pool plumbing designs before a project starts. Additionally, job site photos are taken throughout the process for record keeping purposes.
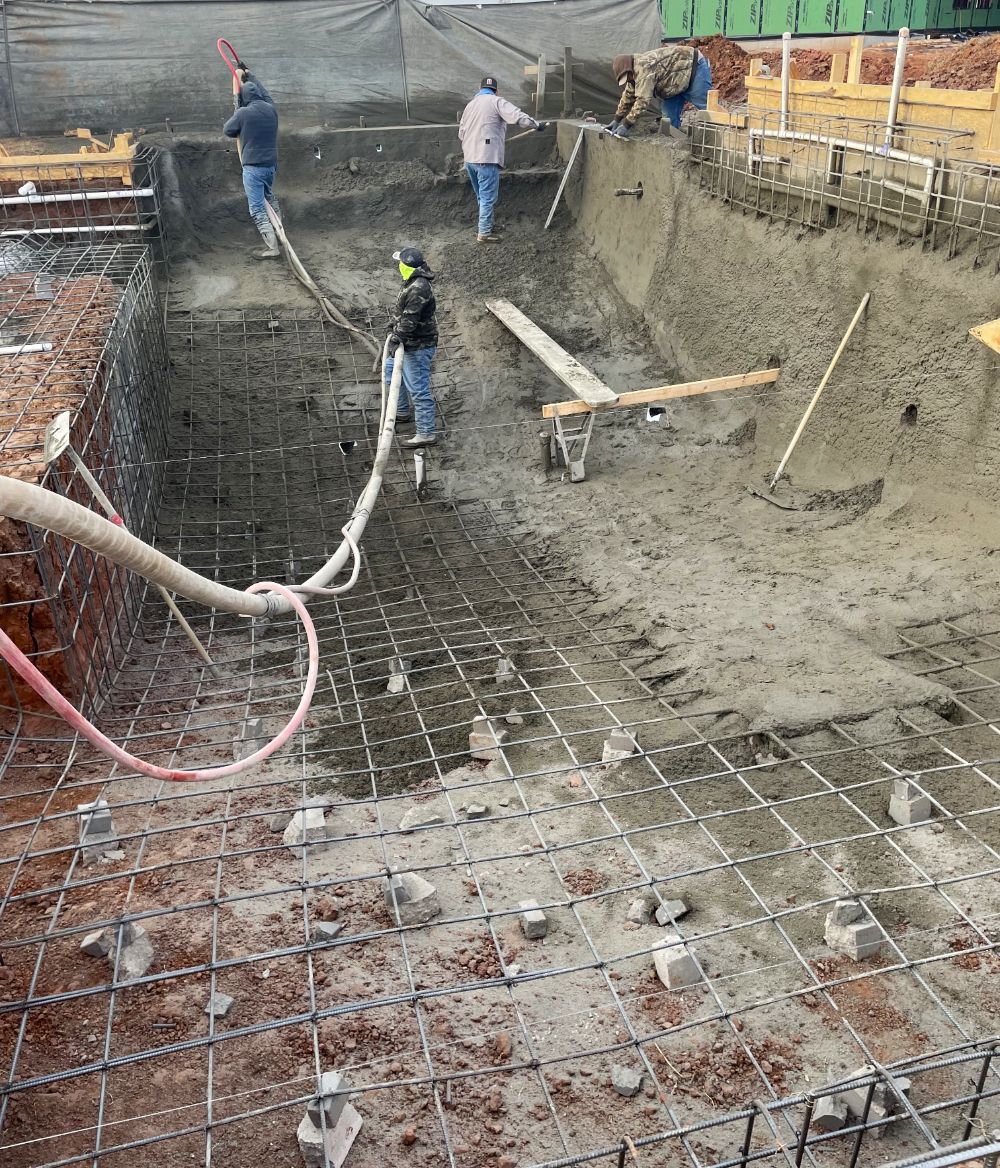
STEP 5
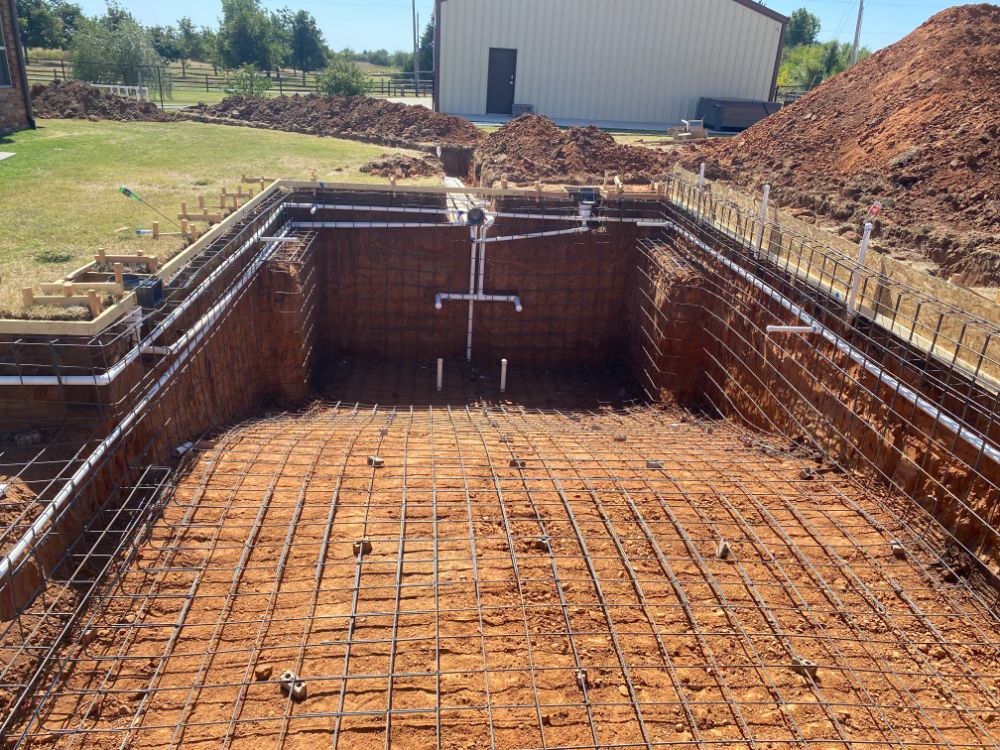
STEEL
- DURATION: 1 to 2 days
The “STEEL” phase of the project determines the strength of the pool structure. The rebar shell is constructed using 3/8″ rebar spaced at least every 8 to 9″ apart, with additional rebar installed as deemed necessary by engineers.
STEP 6
ELECTRICAL
- DURATION: 1 to 2 days
The Electrical Phase of the project involves the safe installation of all electrical components necessary for the pool’s pump, automation, and lighting. Our electricians use underground conduit, equipment sets, and pool lighting while exercising caution to ensure the safety of the pool.
STEP 7
Electrical Inspection
- DURATION: 1 to 5 days
To ensure the safety of your swimming pool , it’s important to obtain an electrical inspection. During this inspection, a city inspector will examine the electrical components of your pool and verify that they meet the standards set by the National Electric Code.
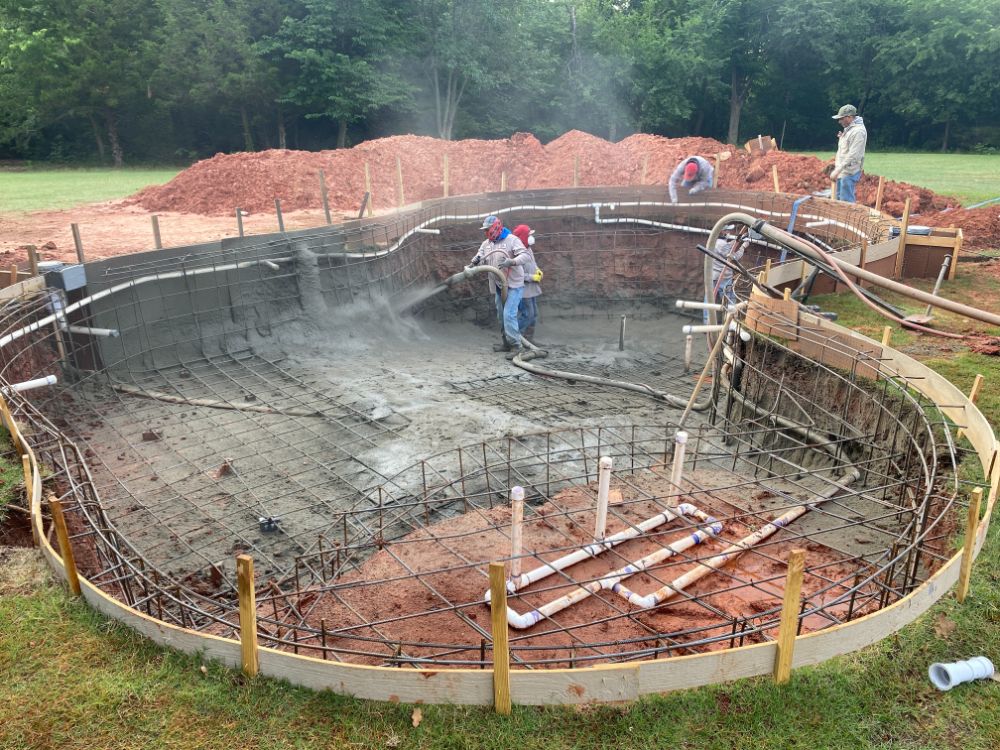
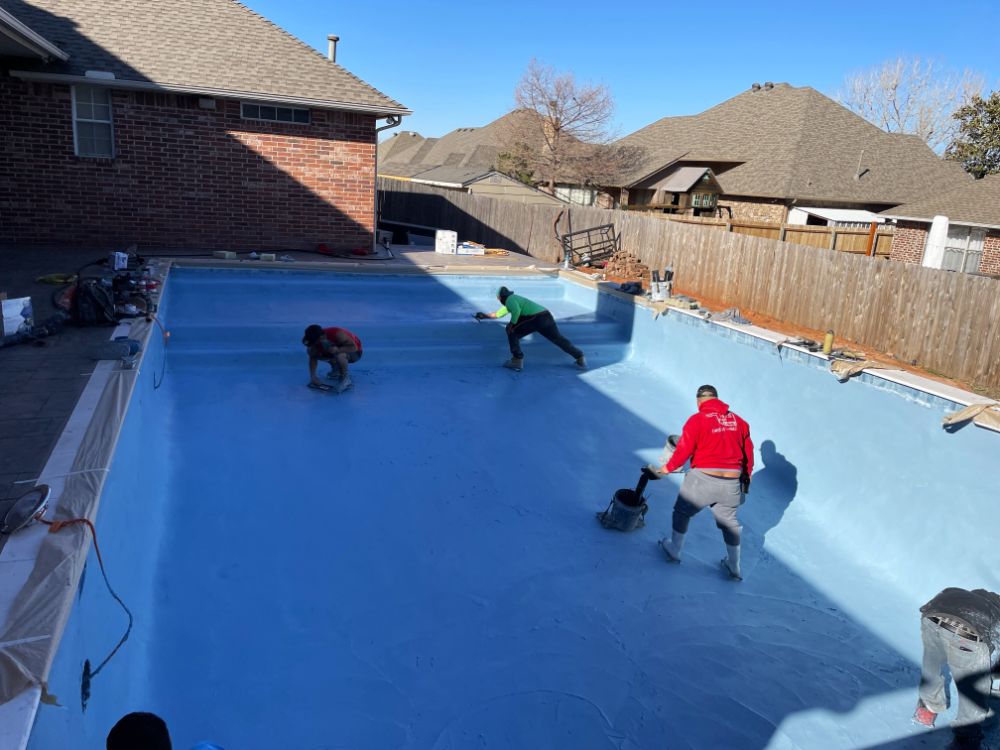
STEP 8
Gunite
- DURATION: 1 day
The most thrilling stage of building a swimming pool in Oklahoma with Thunder Pools is witnessing the application of concrete, also known as gunite. This process involves covering the steel cage with 12” of solid concrete, which solidifies your pool as a permanent structure. Our skilled craftsmen have years of experience and use the strongest concrete available with fiber-mesh reinforcement in all Thunder pools. This guarantees that your swimming pool will endure the Oklahoma weather.
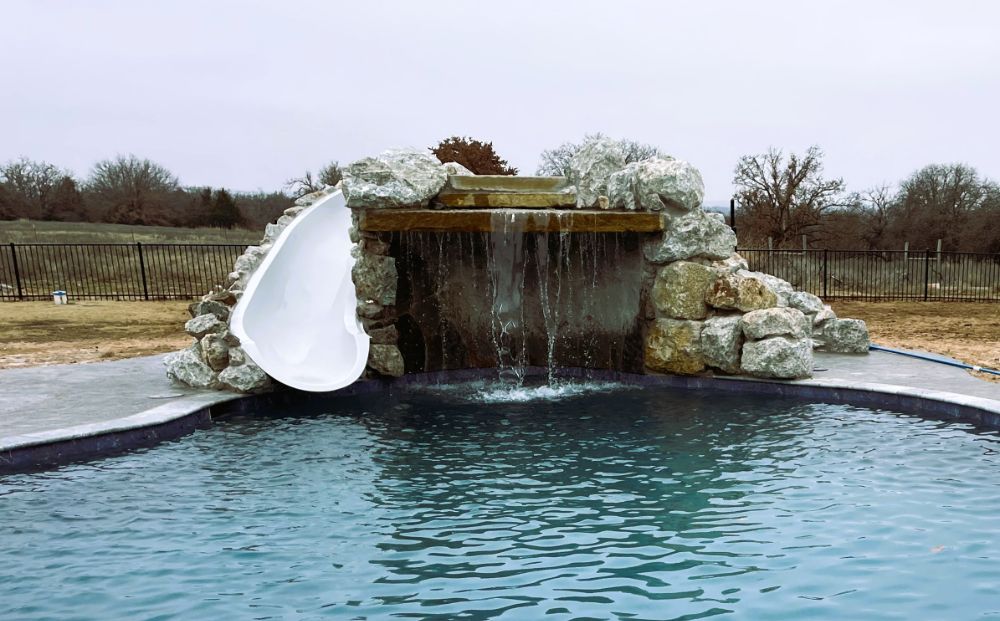
STEP 9
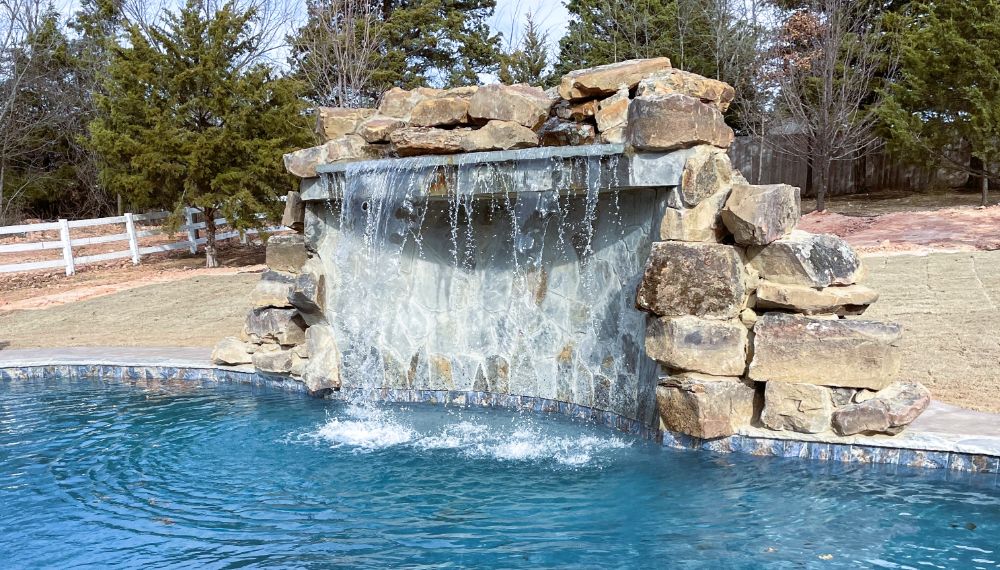
Water Features (if applicable)
- DURATION: 1 to 7 days
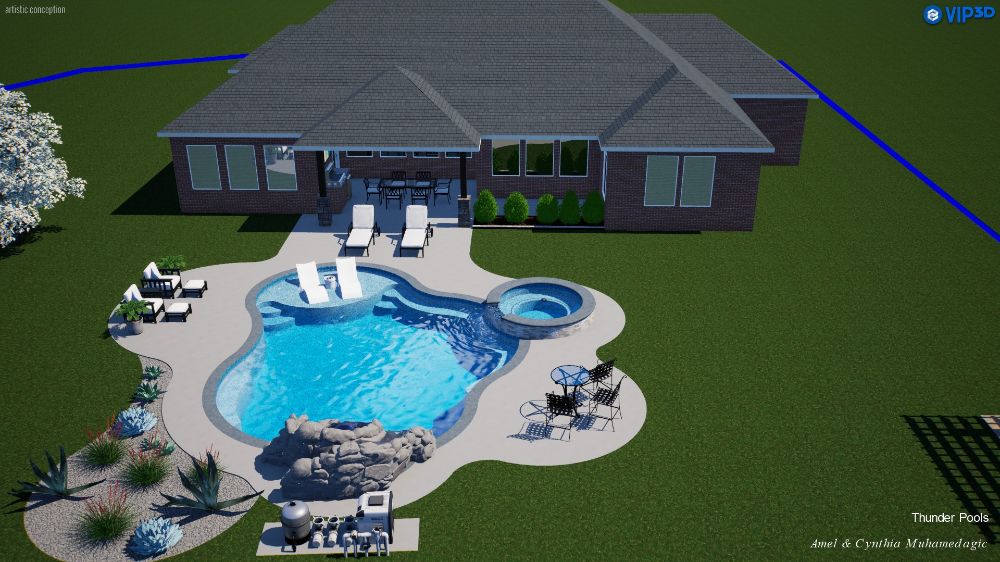
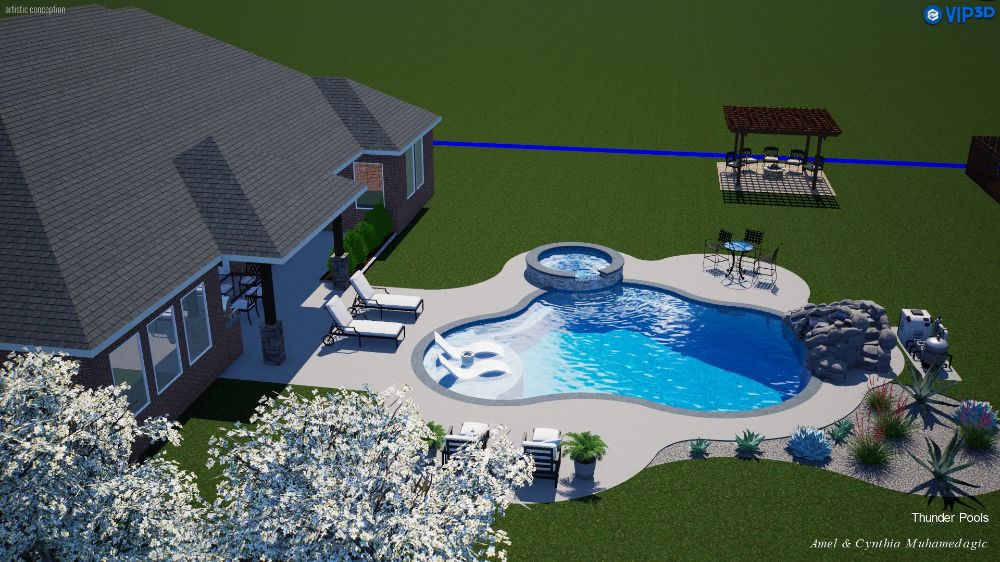
Thunder Pools, Oklahoma’s premier swimming pool builders understand the importance of incorporating water features into a swimming pool and spa project. These features can range from natural rock formations to artificial rock, block, or stone designs. Thunder Pools integrates these elements into the construction process at various stages, depending on the type of water feature. A well-designed and expertly built water feature is crucial to creating a successful swimming pool and spa project.
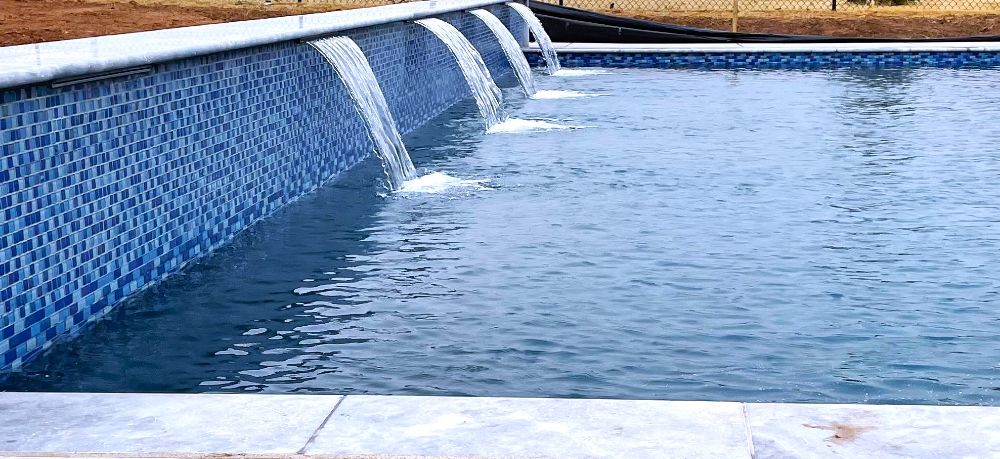
STEP 10
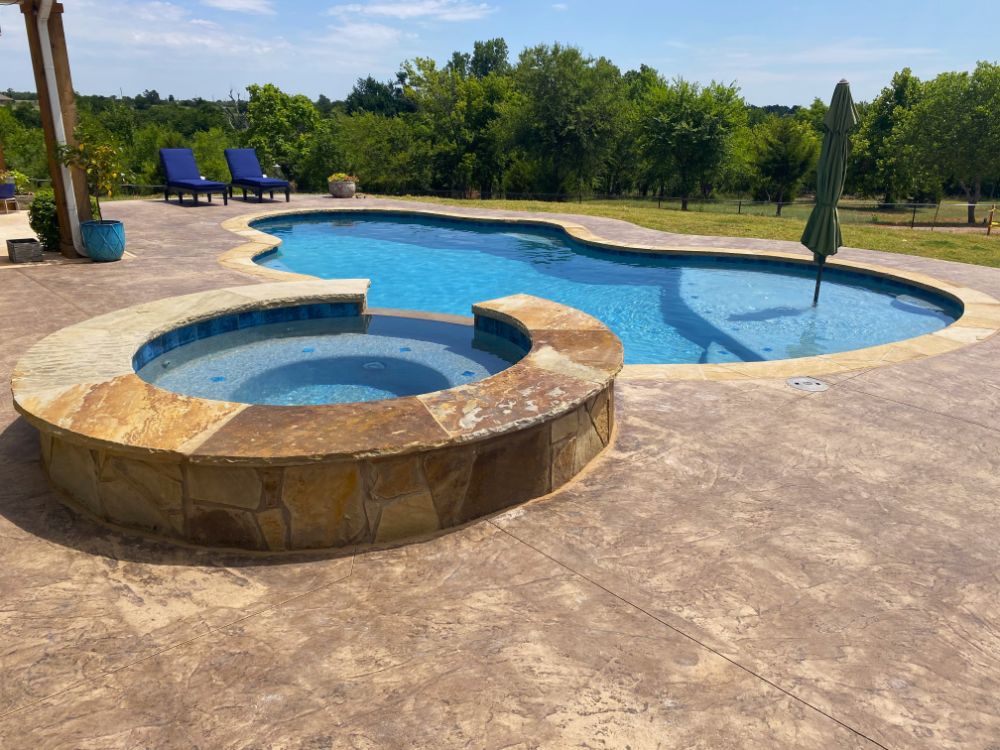
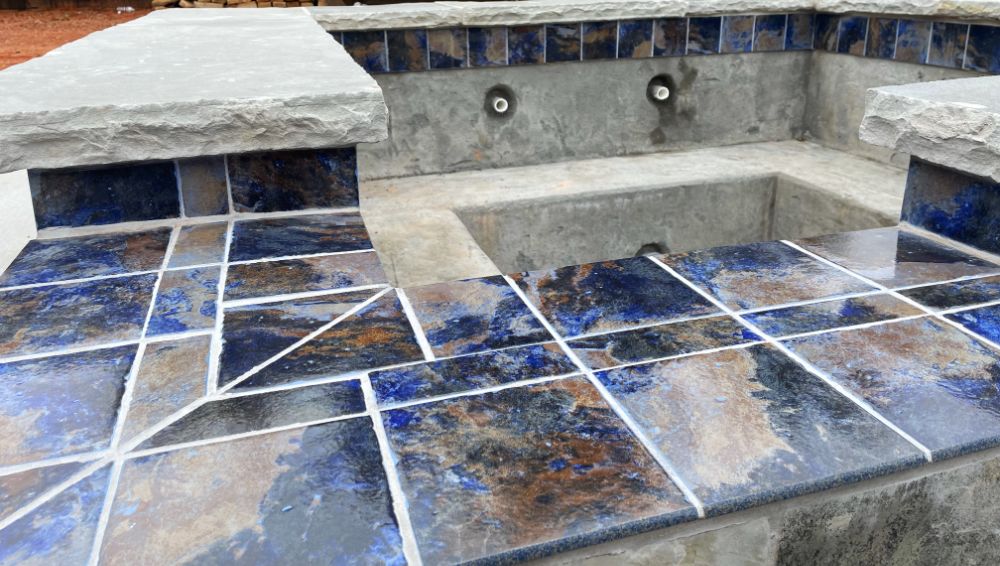
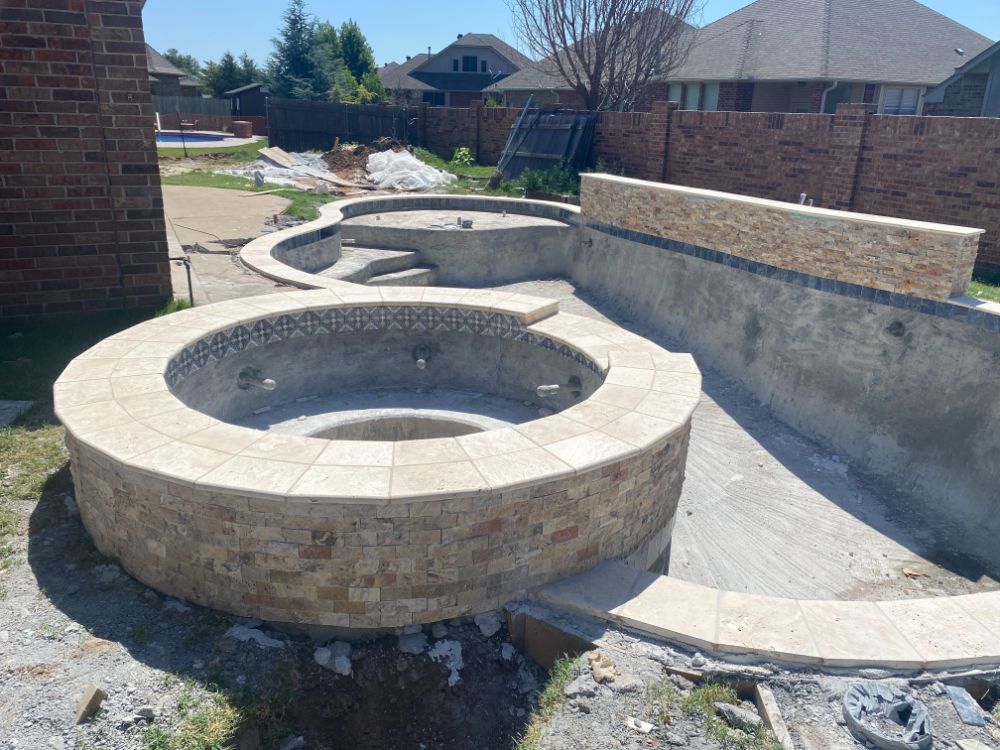
Tile & coping
- DURATION: 2 to 5 days
All our pool masonry and hardscape projects are finished with your new pool tile and coping. Our masons, who are highly skilled, construct block water features, walls, and more.
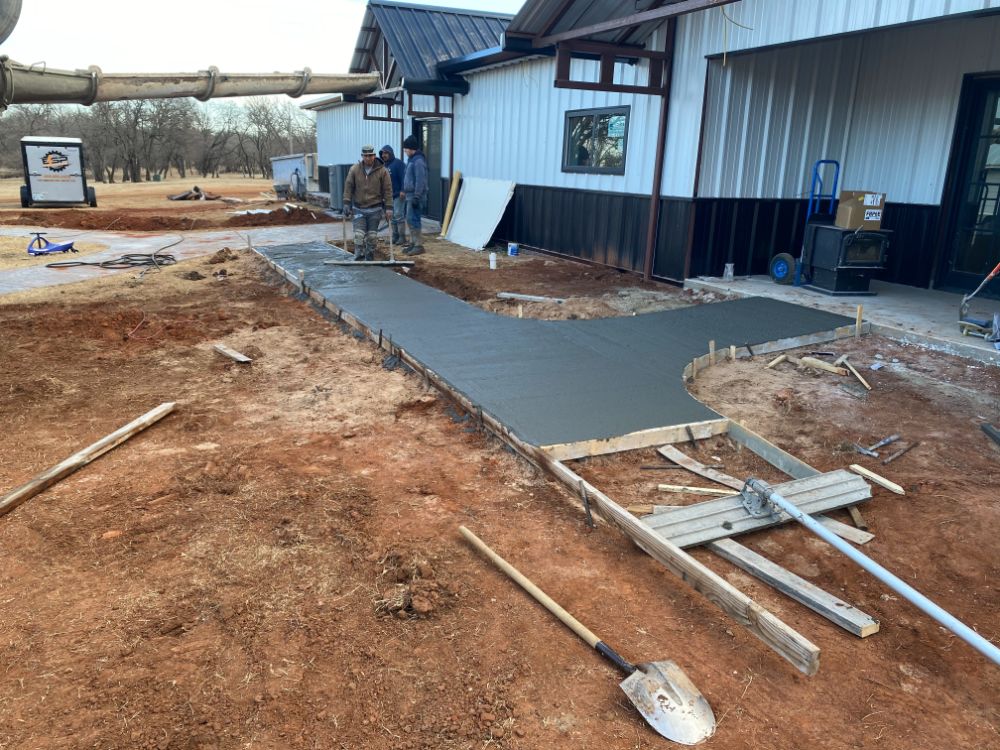
STEP 11
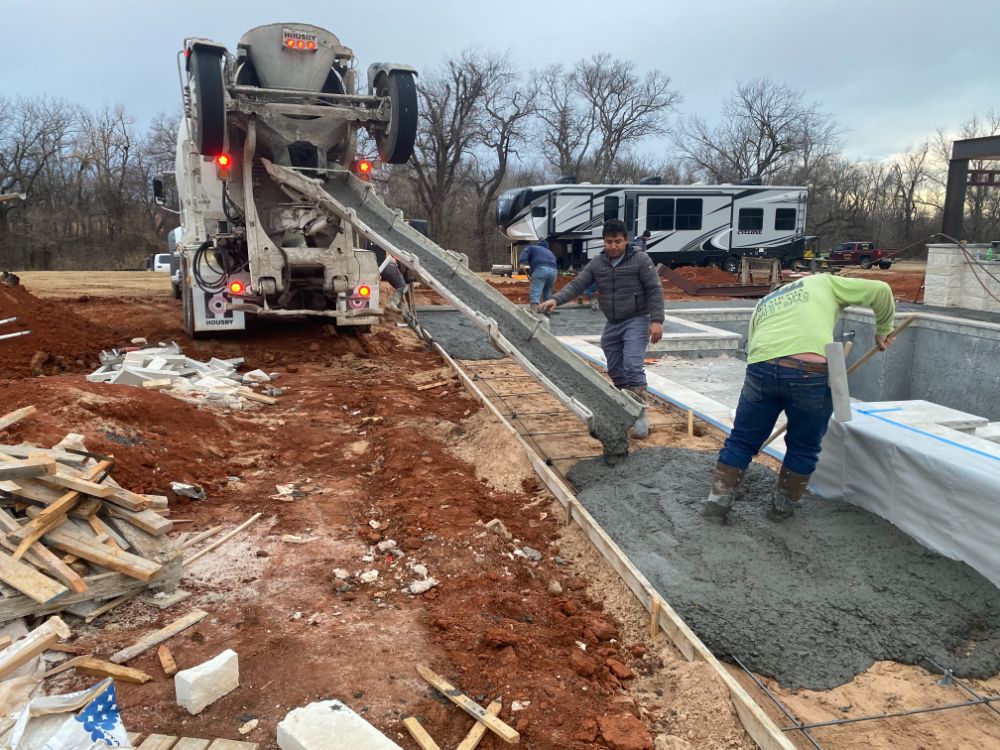
Concrete decking
- DURATION: 1 to 3 days
Installing concrete decking around your new inground swimming pool is an important aspect of completing the overall look and feel of the pool area. Concrete decking provides a durable and low-maintenance surface for lounging and entertaining around the pool. It also provides a safe and non-slip surface for walking and playing near the water. During the installation process, the decking is poured and smoothed to match the shape and size of your design, creating a seamless transition from the pool to the deck.
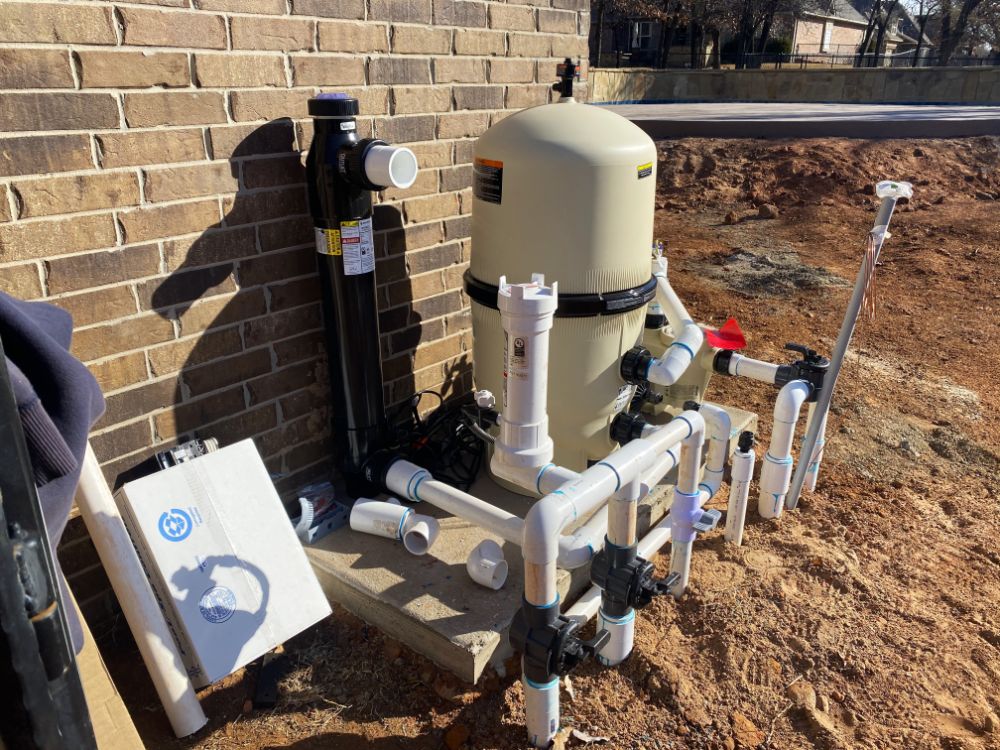
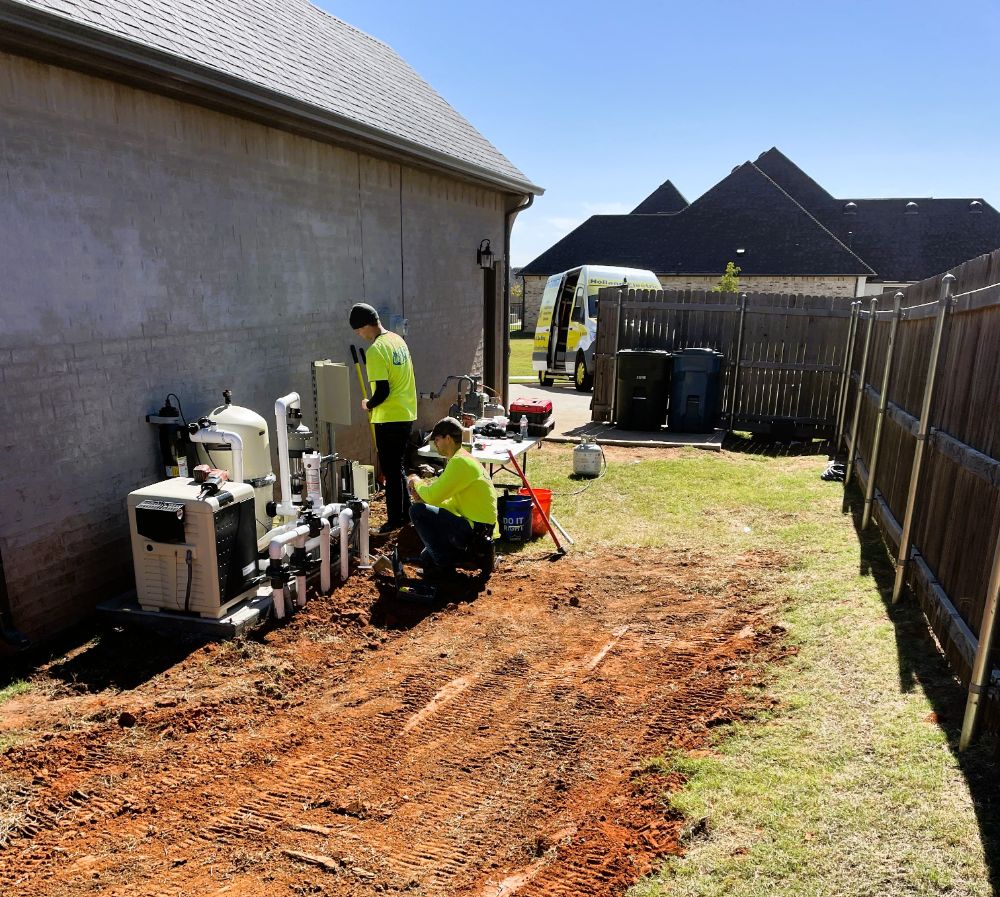
STEP 12
Pool Equipment set
- DURATION: 2 to 6 hours
Thunder Pools uses Pentair pool equipment due to its reputation for innovative technology, energy efficiency, and high-quality products. The process for installing Pentair equipment involves carefully selecting the right equipment for each individual pool or spa, taking into account factors such as pool size, usage, and location. The equipment is then installed by skilled professional plumber who follows strict guidelines and industry standards to ensure proper function and longevity. This combination of exceptional products and expert installation has made Pentair the preferred choice for Thunder Pools and many other companies in the pool and spa industry.
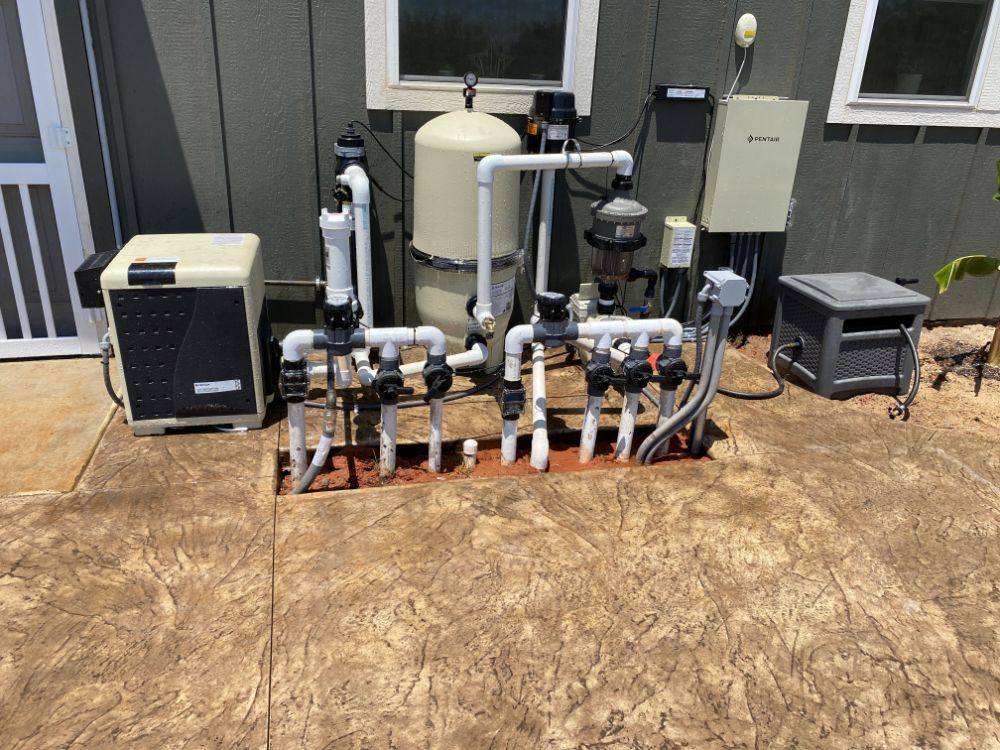
STEP 13
Final electrical
- DURATION: 4 to 8 hours
Our electrical crew will return after the equipment set to finish running all electrical connections from your main house panel to the pool equipment sub panel, and will ensure all other equipment that requires an electrical connection is finished following all NEC electrical codes. In many cases, our electrician will need to reach out to you to arrange access to your electrical panel, which is typically in your garage.
STEP 14
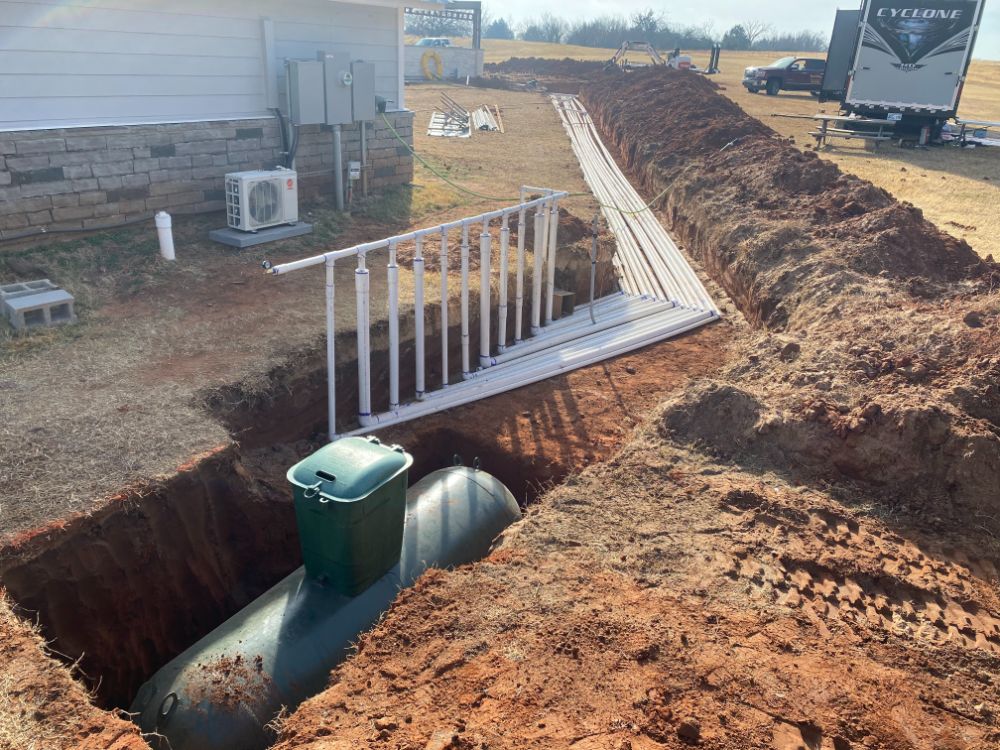
Gas line install (if applicable)
- DURATION: 2 to 6 hours
Installing a gas line for a new swimming pool heater or outdoor features around your new pool requires careful planning and following local Oklahoma codes and regulations. The first step is to determine the location of the gas line and how it will be connected to the equipment. Permits from the local government or gas company are then necessary to proceed with the installation. A licensed plumber or gas fitter will be hired to carry out the work, who will excavate the area and lay the pipe for the gas line. Connecting the gas line to the outdoor equipment requires ensuring a tight and leak-free connection, which is tested for leaks afterwards. The gas company will then inspect and approve the installation before the gas is turned on and the equipment is tested to make sure it is functioning properly.
STEP 15
Final cleanup / yard grade
- DURATION: 2 to 8 hours
After installing a new pool, the final cleanup and yard grading are crucial steps to ensure the area looks neat and well-maintained. This involves removing any debris and excess materials left over from the construction process. The ground surrounding the pool should be leveled and smoothed out to prevent any future issues with water runoff or unwanted poolside erosion. Any grass or landscaping that was disturbed during construction should be restored and maintained to its previous state.
STEP 16
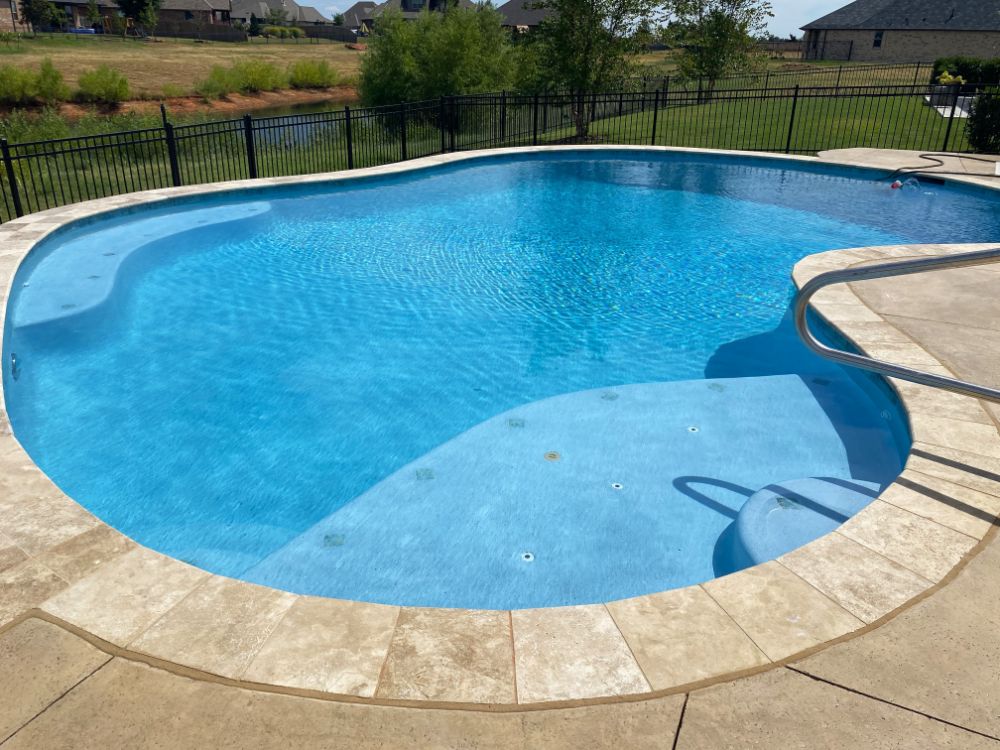
Interior finish install
- DURATION: 1 to 2 days
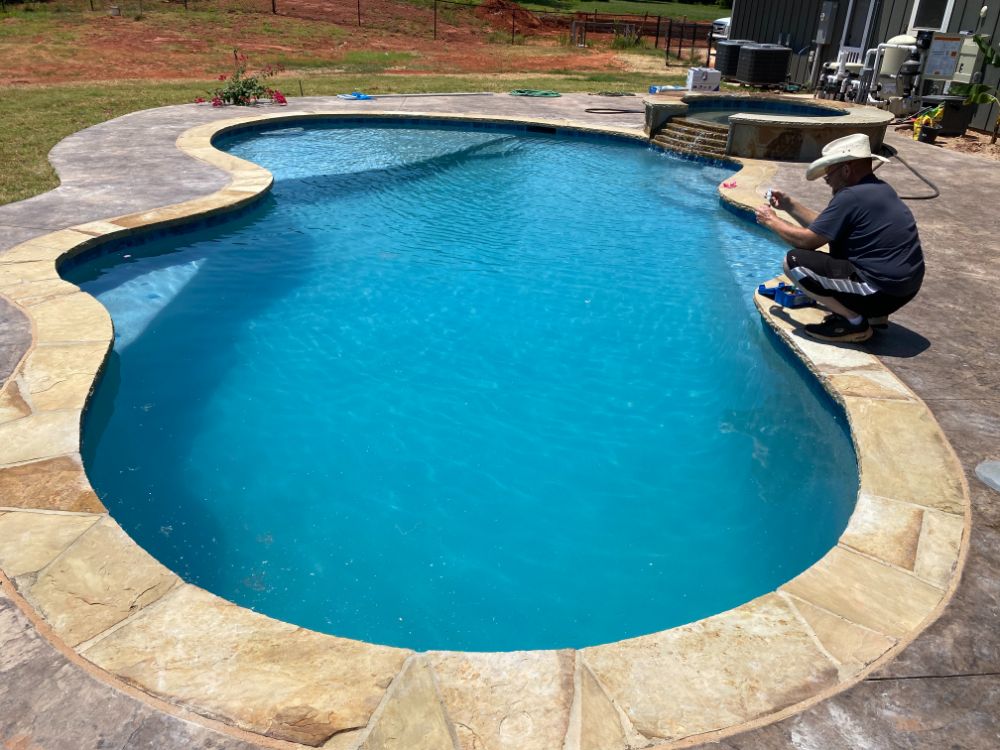
STEP 17
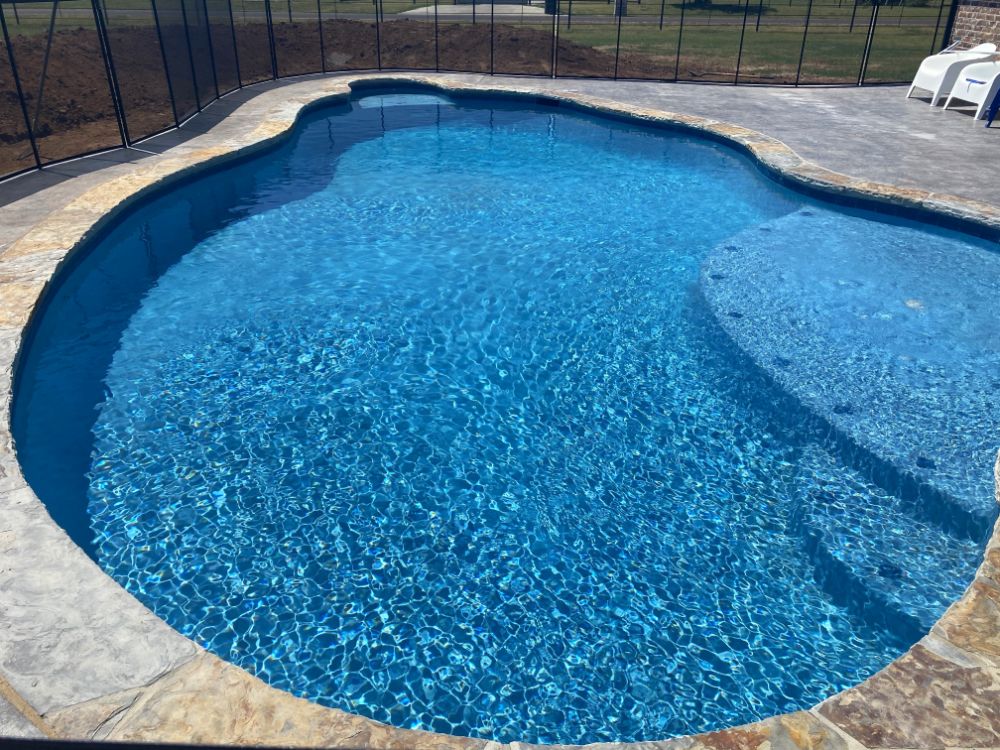
Pool fill
- DURATION: 1 to 3 days
STEP 18
Startup & orientation
- DURATION: 2 to 4 hours ( 2 separate site visits)
Your newly built swimming pool is ready, but familiarizing yourself with its use will take a few days. We’ll begin by adding chemicals and starting the pumps, which is called the StartUp process. During this time, we’ll address any minor issues with the pool and equipment. Once everything is functioning smoothly, Thunder Pools staff will contact you to set up an appointment for a pool orientation . Thunder Pools staff will ensure you feel confident using your new swimming pool.
STEP 19
Final Electrical Inspection
- DURATION: 1 hour
Our electrician will contact the city jurisdiction from where your permit was pulled, and arrange a time to meet with them to go over all the final electrical connections to ensure all codes are followed for your safety.